Collaborate on Word documents with real-time co-authoring
One of the strongest assets any student can have is the ability to work well within a team. Collaboration with partners that are both real and digital is a hallmark of the modern workforce. Teamwork means power and support, and it’s essential to success in any business environment.
Microsoft products that we work with every day allow us now to work together on the same document. This is a new paradigm from the old "attach the document to an email" way of working that we are so familiar with. As soon as you do this there are now two documents that are the same, if the document is sent to 250 staff there are now 251 documents, all living on 251 computers.
Instead of attaching a document to an email, wouldn't it be better to attach emails to a document which point users to the place that document lives - in the cloud. Now those 250 emails point to the same document online and 250 people can view or collaborate on just ONE document. It is a simpler, cleaner and modern way to work with the tools we use daily.
Here is how it is done:
Applications
There are SO many ways this can work to enhance collaboration for students and staff.
- Working together with a group of teachers on a scheme of work
- A staff group project on their topic for an inquiry action group
- Students working in groups on an assignment
- A class brainstorm on a topic
- Use as a backchannel for student to pose questions during a lesson
- A class collaboration on a field trip report
- Students can share an essay /poem for peer review and feedback
- Prepare a document with deliberate errors and ask the class to work together to find and correct mistakes
- Create a collaborative notes document for a topic
I am sure that you could think of ways this would apply to you!
Here are the details:
Save a document and collaborate
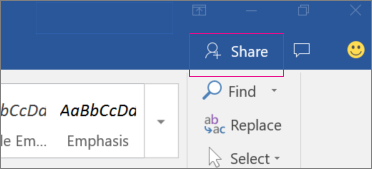
- Choose Share > Save to cloud. If you are using Office 2013 you can go to File > Share to get the same options.
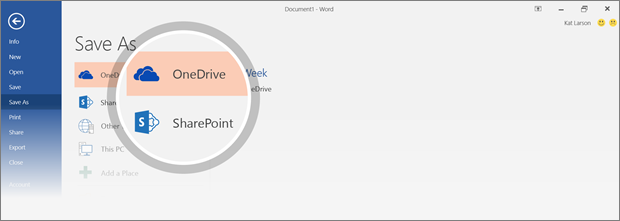
- Choose the OneDrive or SharePoint Online location and folder you want, and then choose Save.
 NOTES:
- If you’ve never saved a document online, choose Add a Place, and then add your OneDrive or SharePoint service by signing in.
- You only have to Save to OneDrive or SharePoint once for each document. The next time you open the document, it’ll save back to the same location automatically.
- In the Share pane, do one of the following:
- To have Word send people a link to your document, type their email addresses in the Invite people box. Set their permissions to Can edit, and add a message if you want. Make sure the Automatically share changes is set to either Ask me or Always, and then choose Share.
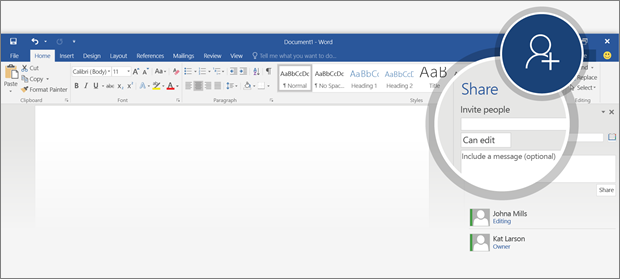
- To invite people yourself, choose Get a sharing link at the bottom of the Share pane, and paste that link into email or an instant message.

Start working together in a document
- Open and edit the document in Word 2016 or Word Online.
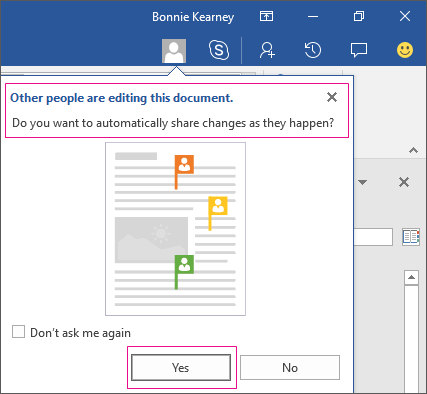
- If you’re using Word 2016 and haven’t already agreed to let others see your changes, choose Yes to allow automatic sharing.
- When people follow the link you sent, your doc will open in their version of Word, or on Word Online. If they’re also using Word Online or Word 2016 and have agreed to automatically share changes, you’ll see their work as it happens.
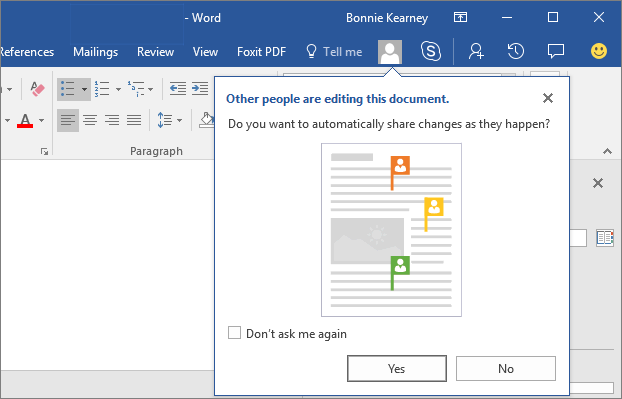
- Colored flags will show you exactly where in the document each person is working.

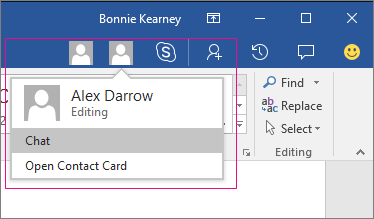
- Word will alert you when people enter or leave.
- You can instantly chat with the people who are working in the document by using Skype for Business. It opens a chat window for instant conversation. Choose the Skype for Business button to start a group chat with everyone working in the document.
- Choose Comments on the ribbon to make or view comments. Also, you can reply to or resolve comments and then mark them as complete.
NOTE: If someone who didn’t opt in to real-time co-authoring is working in the document when you are, you’ll see that they’re in the document, but you won’t see their changes until they save the document.
Document activity
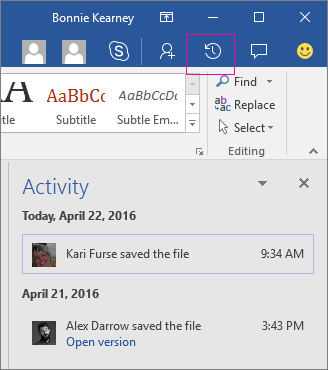
The Activity pane lets you see the complete list of changes made so far, and gives you access to the earlier versions. Choose Activity  to see the Activity pane.
 to see the Activity pane.
Options for sharing changes
Here’s what the options in the Automatically share changes list mean.
- Always: If you choose this option, others who have agreed to share their changes will always be able to see yours.
- Ask me: If you’ve never used real-time co-authoring before, you’ll be asked whether you want to automatically share your changes as they happen. Choose Yes to always allow automatic sharing when you're working with others. Clear the Don’t ask me again check box if you do want to be asked the next time you open a document in which someone else is sharing their changes.
- Never: By selecting Never you opt out of real-time co-authoring for this and all other documents. Only you will be able to see your changes until you save your document back to its online location. Nor will you see theirs as they happen. You will, however, be able to see who else has a document open.
NOTE: Each setting affects Word, not just the document you're working in. To change settings, go to File > Options > General> Real-time collaboration options.
